Manufacturing settings for material groups
The manufacturing settings for material groups apply to all subordinate single materials. In particular, the configuration of optional tools has a significant impact on manufacturing quality.
Optional tools
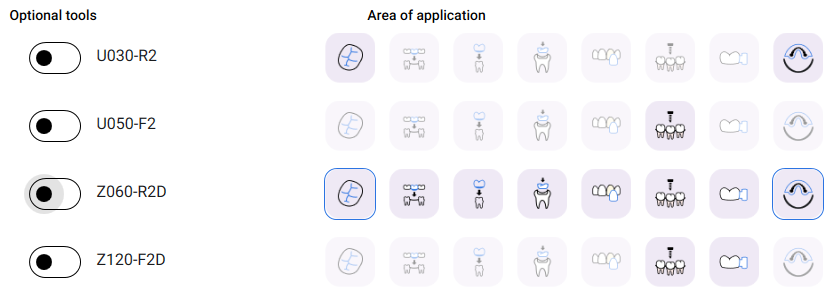
In this area, you can activate or deactivate tools for optional manufacturing steps during finishing. These can significantly improve manufacturing quality, but they also increase manufacturing time.
For certain geometries, the use of optional tools is necessary to ensure sufficiently precise manufacturing. These include, among others:
-
Right-angled inner edges of screw-access channels
-
Connection geometries for two-piece abutments
-
Tight cavities in anterior crowns
When it comes to purely aesthetic improvements, the use of optional tools is typically a cost-effective decision.
You can activate optional tools using the toggle switches and icons:
-
Use the toggle switches below the Optional tools label to activate the general use of the respective tool.
-
Use the icons below the Area of application label to select where dentalcam applies the tool. A blue border indicates that an optional tool has been activated for the respective application area.

Optional tool activated

Optional tool deactivated

Optional tool not available
| Icon |
Area of application |
Match code | Function | ||||||||||||
|---|---|---|---|---|---|---|---|---|---|---|---|---|---|---|---|
|
– |
General parameters |
|
|
||||||||||||
|
|
Occlusal surfaces |
|
|
||||||||||||
|
|
Basal surfaces |
x060-Rx-xx |
For finishing fine details in interdental areas of bridges |
||||||||||||
|
|
Cavities |
x060-Rx-xx |
For finishing narrow areas in cavities, e.g., in anterior crowns |
||||||||||||
|
|
Cavities of inlays / onlays |
x060-Rx-xx |
For working out narrow areas inside the cavities of inlays / onlays |
||||||||||||
|
|
Cavities in veneers |
x060-Rx-xx |
For working out narrow areas inside the cavities of veneers |
||||||||||||
|
|
Drill holes |
|
|||||||||||||
|
|
Attachments |
|
|||||||||||||
|
|
Anterior tooth editing (90°) |
|
|||||||||||||


General manufacturing settings for material groups
 Remaining size of partially reduced bars
Use this setting to specify the remaining size of partially reduced bars as a percentage.
For an overview of the type of bars and their intended use, see Bar types.
Manual cavity inspection
For components such as telescopic crowns, cavities must be particularly precise to ensure a high degree of accuracy. For best results, dentalcnc can interrupt the manufacturing so that you can check the cavities. If necessary, the machine will rework the cavities several times using different sizes until you are satisfied with the result.
This function requires that you be present during manufacturing and operate the dentalcnc computer. Recommendation: Activate this function only if you are manufacturing objects with cavities that require extra high precision.
Reduced noise operation for grinding jobs
If you want to reduce the manufacturing noise for all future calculated grinding jobs, activate this setting.
If activated, it reduces the feed rate as well as the tool path distance for grinding jobs. This increases the manufacturing time.
Engravings
Engraving allows you to add milled labeling to objects. An engraving helps you identify objects after they have been separated from the blank.
|
Parameters |
Description |
Figure |
|---|---|---|
|
Size |
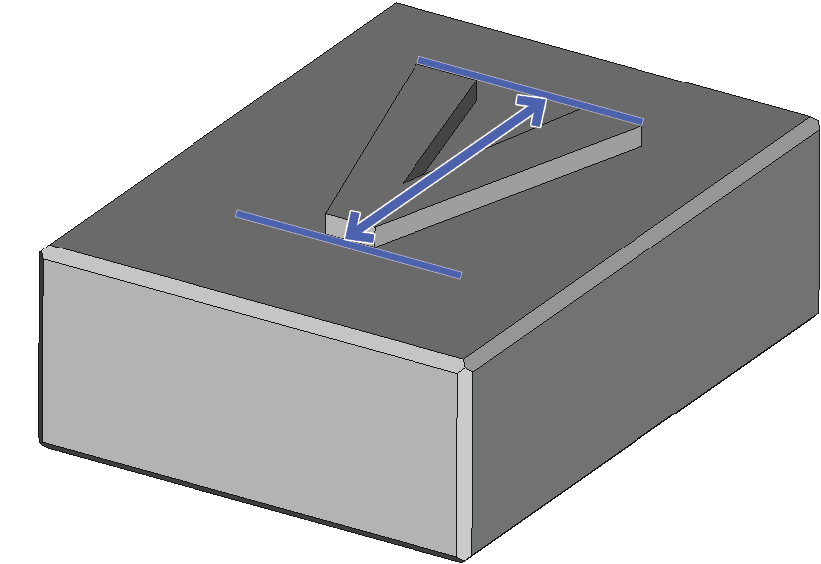
Character height in millimeters |
Engraving character height (diagram) |
|
Embossing/Relief embossing |
The height or depth of the engraving in millimeters:
|
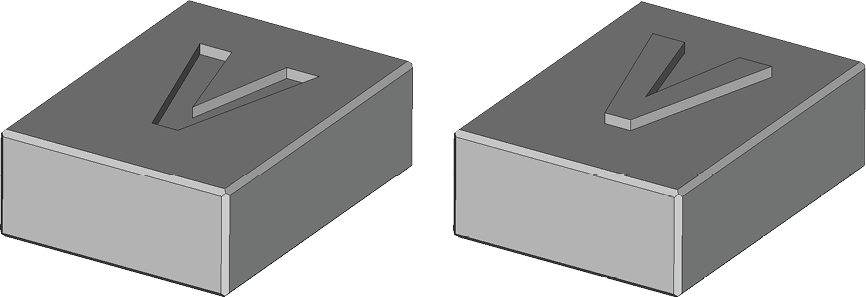
Left: Engraving as embossing; right: Engraving as relief embossing (diagram) 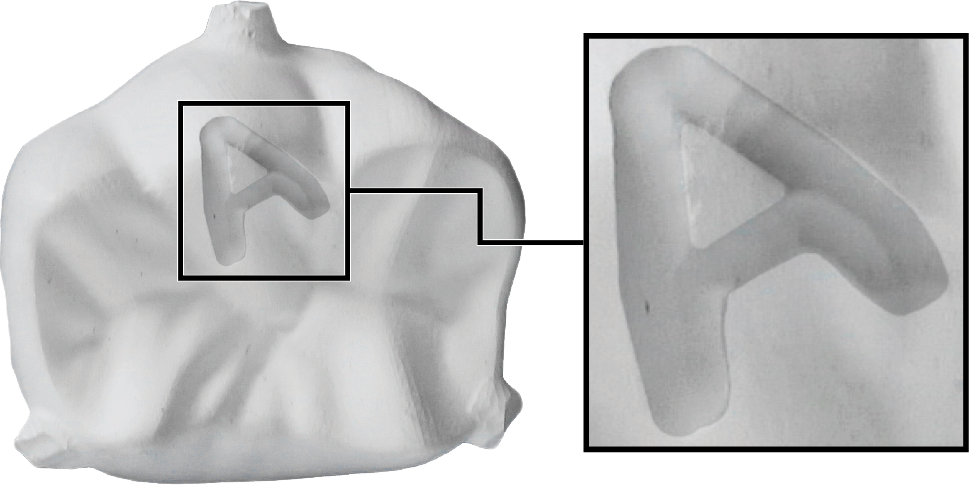
Recessed engraving (“A”) in a crown |
 Manufacturing sequence
The manufacturing determines when objects are fully calculated and manufactured during a job and when tools are changed.
Recommendation: If Per object is preset for a material, leave this setting unchanged. According to our experience, you will benefit from increased process reliability when using these materials.
|
Parameters |
Description |
Figure |
|---|---|---|
|
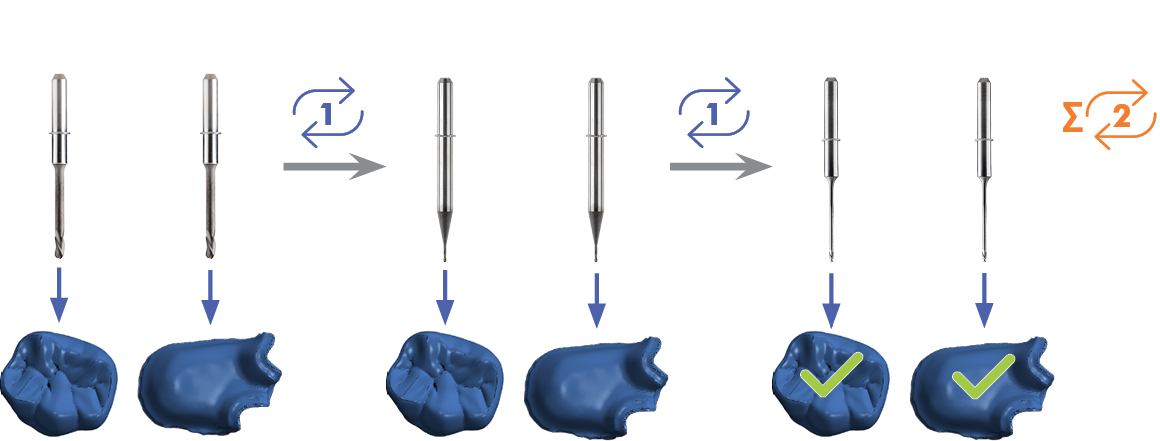
All objects in parallel (based on tool usage) |
All items are calculated and manufactured in parallel.
|
Diagram: Parallel manufacturing of 2 objects using 3 tools and 2 tool changes The chart does not provide any indication of manufacturing time. |
|
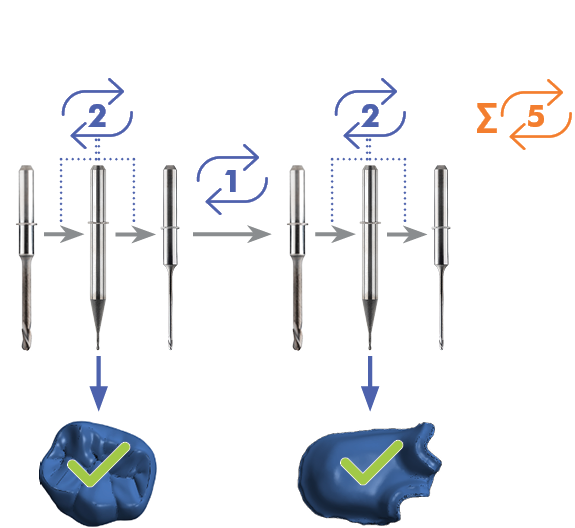
Per object |
All objects are fully designed and manufactured one after the other.
|
Diagram: Piece-by-piece manufacturing for 2 parts using 3 tools and 5 tool changes The chart does not provide any indication of manufacturing time. |
|
Parameters |
Advantages |
Disadvantages |
|---|---|---|
|
All objects in parallel (based on tool usage) |
Can significantly reduce manufacturing time, especially when optional tools are used frequently. |
|
|
Per object |
|
|
Auto-positioning: Distance between tool spaces
This allows you to specify the distance that dentalcam aims for between tool spaces during auto-positioning.
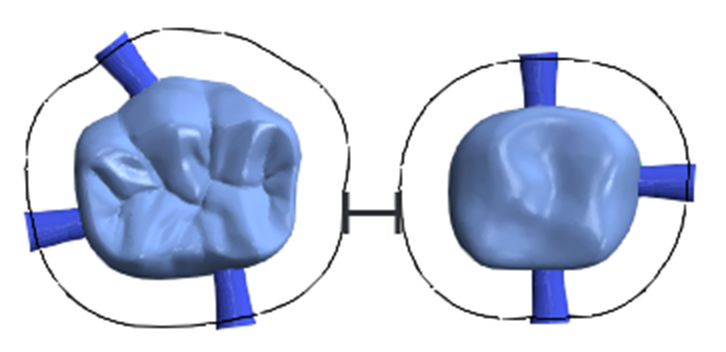
Example: 2 mm spacing between tool spaces


