Using Auto-nesting features

With the Auto-nesting features, you save time because dentalcam automates certain nesting steps. You can manually execute the Auto-nesting features in the Nesting view.
-
In the program settings, you can configure the software to dentalcam automatically execute the auto-nesting functions when loading a blank. Manual execution is still possible.
-
You can adjust the results of the auto-nesting functions.
Executing auto-positioning manually
dentalcam arranges all objects in the disc were not locked for auto-positioning.
Requirement You are editing a blank in the Nesting view using any objects.
-
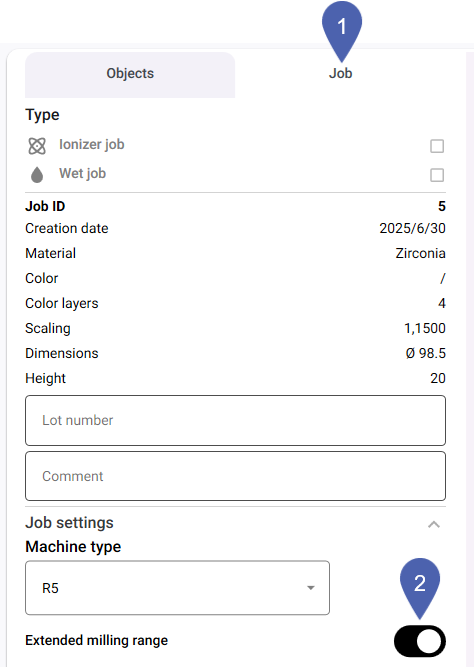
If you want to use the extended milling range:
-
Select the Job tab.
-
In the Job settings section, select the Extended milling range toggle switch.
The extended milling range allows objects to be nested right up to the edge of the disc. This increases material utilization but reduces process reliability.
-
-
Select the Objects tab.
-
Select the desired entry from the Object arrangement drop-down list.
Notes on list entries Entry
Object arrangement
Spiral-shaped
Spiral shaped from the center of the blank
This arrangement is recommended for machines with a partially open blank holder (C shape).
-
In the Auto-nesting section, select the Positioning button.
Executing auto-bars manually
dentalcam positions bars on each object. The number of bars depends on the indication and the material shape.
Requirement You are editing a blank in the Nesting view using any objects.
-
Select the Objects tab.
-
Decide which bars dentalcam should be set:
-
Open the Set bars editing function with
 . (missing or bad snippet)
 Close the Set bars editing function with
.
-
-
In the Auto-nesting section, select the Bars button.


