Operation: Executing jobs
How do I start machining? How can I start milling? How can I start grinding?
You control and start manufacturing with dentalcnc. In this chapter, we will give you a brief overview. For the complete instructions, see the documentation for dentalcnc.
Damage to the machine when using damaged tools and blanks
If tools or blanks are damaged, parts can break off and damage the machine during job execution.
- Check the blanks and tools thoroughly for damage before every job execution.
When you have prepared your jobs and your machine, you can start machining. Machining is a fully automated process and only requires your attention in case of unexpected events.
Do not move the machine during job execution, otherwise the results may become imprecise.
Starting jobs
- Ensure the following:
-
- All required tools are in the right positions in the tool magazine and are neither worn nor damaged.
- The required blanks are mounted.
-
 Part of the blank changer in which you store the blanks for automatic loading. and are assigned in dentalcnc.
 -
- The compressed air supply is set correctly.
- Close the working chamber door.
-
If you manually control the suction unit, switch it on and set it to the required level.
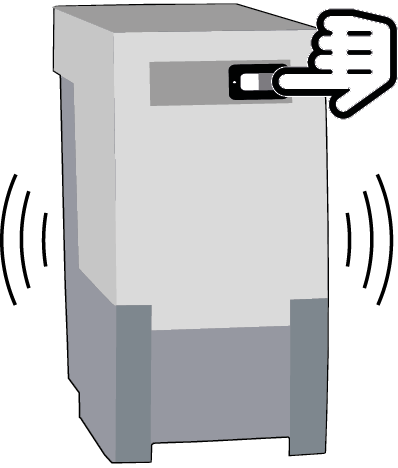
For dry manufacturing: If you manually control the suction unit (optional), switch it on and set it to the required level.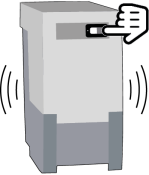
- Start dentalcnc.
-
The suction unit is running.
Machining starts.
Aborting machining
- Confirm the current message.
- The following happens:
-
dentalcnc asks whether the tool in the spindle can be safely inserted into the tool magazine.
If inserting the tool would damage the tool magazine inserts, the tool must be removed manually.
- If the spindle has moved into the tool change position, continue with the next step.
-
CAUTION!Wear gloves.
- Open the working chamber door.
-
Hold the tool in the collet chuck in place.
- Confirm the current message.
- The collet chuck opens.
- Remove the tool from the collet chuck.
- If your machine is equipped with a manual working chamber door, close the door.
- Confirm the current message.
- The following happens:
- The collet chuck closes.
- The spindle moves to its default position.
Job interruptions and job abortions
A job will be interrupted in the following cases:
- The compressed air supply is not sufficient
- The vacuum in the working chamber is not sufficient
-
An interrupted job will normally be continued automatically after the error is corrected.
A job will be aborted in the following cases:
- In case of a machine malfunction
- In case of a tool breakage
- In case of a power failure
If a job was aborted, you have to restart it.
How to proceed in the event of a job interruption
If the compressed air is insufficient
- Check the following:
- The manometer of the compressed air regulator
- The installation of the pneumatic hoses
- Your compressor
If the vacuum is insufficient
- Check the suction hose and your suction unit.
If the cooling liquid flow rate is insufficient
- Check that the wet grinding module is correctly installed and operational.
- Check if there is enough cooling liquid in the tank.
- Check if the cooling liquid, the tank and the filter are clean.
How to proceed in the event of a machine malfunction
A machine malfunction is detected by the internal control unit when a critical event occurs. The working chamber will be illuminated in red.
- Record the error message and error code that is displayed.
- Restart the machine and the CAM computer The computer that is connected to your machine and which runs dentalcam and dentalcnc.. If the problem persists, continue with the next step.
- Disconnect the machine from the electrical source and prevent it from being restarted.
- Contact customer service. Have the error message and error code readily available.
- To remove a blank from the working chamber, open the working chamber door manually if necessary.
How to proceed in the event of a tool breakage
If a tool breaks during machining, the machine will not recognize this immediately. Instead, the spindle will continue to move with the broken tool. The tool breakage will be detected when the following events occur:
- The next regular tool change
A tool breakage can be caused by the following:
- The tool was damaged or worn
- The tool was put into the wrong tool position or was manually inserted into the spindle at the wrong time. As a consequence, it was not suitable for the processing step.
- The distribution of the objects in the blank (“nesting”) was not correct.
If a tool breaks, do the following:
- Open the working chamber door.
- Remove all parts of the broken tool from the working chamber and the collet chuck.
- Re-add the tool to the virtual ATB and virtual tool magazine in dentalcnc.
- If the spindle picked up the tool from the tool magazine, check if the tool was inserted into the correct position. Insert a backup tool into the correct position in the tool magazine.
- If you manually inserted the tool into the collet chuck, check if the broken tool corresponds to the tool type which you were prompted to insert. Have a correct spare tool ready.
- Close the working chamber door.
- Resume the job.
If tools break regularly, you can find additional information in the troubleshooting section: Troubleshooting
How to proceed in the event of a power failure
While the machine is not receiving power, you have no access to the working chamber.
- After a short power failure, restart the machine and the CAM computer The computer that is connected to your machine and which runs dentalcam and dentalcnc..
- If you need to access the working chamber in case of a longer power failure, perform an emergency opening of the working chamber door.
Machine component which stores multiple blanks in a magazine and which can automatically load them into the working chamber.. When using the search, use a blank changer or a blank magazine instead is moving when a power failure occurs, it may not move back to the default position. This will produce an emergency stop signal when the machine is started and the machine will not reference.
- If the blank changer Machine component which stores multiple blanks in a magazine and which can automatically load them into the working chamber.. When using the search, use a blank changer or a blank magazine instead does not move and the machine does not reference, perform a manual reset of the blank changer Machine component which stores multiple blanks in a magazine and which can automatically load them into the working chamber.. When using the search, use a blank changer or a blank magazine instead to default position. Operation: Executing jobs
Emergency opening of the working chamber door
Crushing hazard and cutting injuries if the working chamber door is open
If the working chamber door is open during machining, it will not protect users from bruises and cuts.
- Do not open or close the working chamber door during machining.
- Never operate the machine with the working chamber door open.
- Perform the emergency opening only if you are authorized to do so and if you have received training on it.
- Activate the safety interlock immediately after completing your work in the working chamber.
Cutting injuries caused by rotating tools
If a power failure or a machine malfunction occurs during machining, the spindle including the inserted tool keeps rotating. If you touch the rotating tool, you will suffer from cutting injuries.
- Wait until the spindle has stopped rotating before performing an emergency opening.
- Do not carry out the emergency opening during regular operation.
The lever for the emergency release is located on the right underside of the machine.
S2: Manually resetting the blank changer to the default position
Cutting injuries caused by rotating tools
If a power failure or a machine malfunction occurs during machining, the spindle including the inserted tool keeps rotating. If you touch the rotating tool, you will suffer from cutting injuries.
- Wait until the spindle has stopped rotating before performing an emergency opening.
- Do not carry out the emergency opening during regular operation.
In some cases (e.g. when a power failure occurs) the blank changer Machine component which stores multiple blanks in a magazine and which can automatically load them into the working chamber.. When using the search, use a blank changer or a blank magazine instead may not be able to move back into default position. This will produce an emergency stop signal when the machine is started and the machine will not reference.
In this case a manual reset of the blank changer Machine component which stores multiple blanks in a magazine and which can automatically load them into the working chamber.. When using the search, use a blank changer or a blank magazine instead to default position is required.
- Open the working chamber door. If necessary, perform an emergency opening of the working chamber door. Emergency opening of the working chamber door
- Switch off the machine at the main power switch. Disconnect the machine from the eletrical source.
- Disconnect the machine from the external compressed air supply.
- Open the blank magazine Part of the blank changer in which you store the blanks for automatic loading. door.
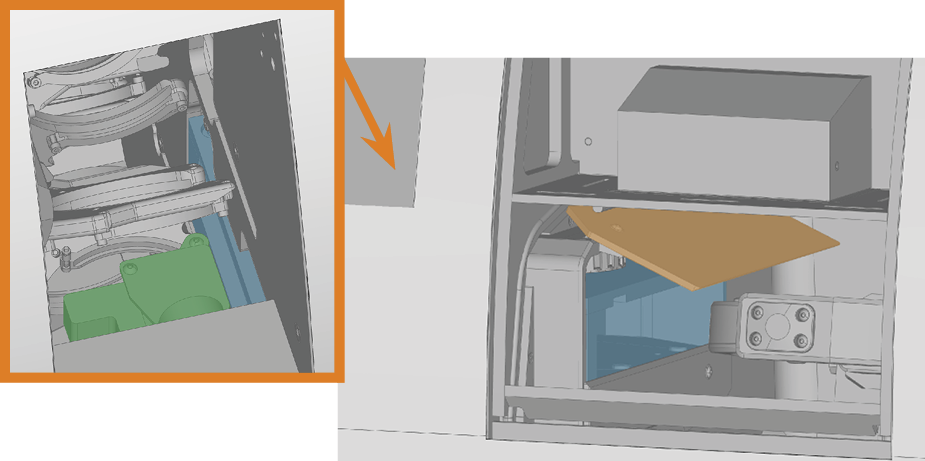
- With one hand open the blank changer Machine component which stores multiple blanks in a magazine and which can automatically load them into the working chamber.. When using the search, use a blank changer or a blank magazine instead flap (marked orange) in the working chamber.
- With the other hand push the loading unit of the blank changer Machine component which stores multiple blanks in a magazine and which can automatically load them into the working chamber.. When using the search, use a blank changer or a blank magazine instead (marked blue) towards the blank magazine Part of the blank changer in which you store the blanks for automatic loading. until you can reach the blank gripper (marked green).
- If there is a blank frame in the blank gripper, open the gripper and remove it.
- Close the blank gripper.
- Push the loading unit of the blank changer Machine component which stores multiple blanks in a magazine and which can automatically load them into the working chamber.. When using the search, use a blank changer or a blank magazine instead completely towards the blank magazine Part of the blank changer in which you store the blanks for automatic loading..
- Push the blank gripper into the end position at the left side of the machine.
- Open the gripper.
- The blank changer Machine component which stores multiple blanks in a magazine and which can automatically load them into the working chamber.. When using the search, use a blank changer or a blank magazine instead is in the default position.
- Close the working chamber door.
- If you performed an emergency opening, reactivate the safety interlock of the working chamber door. Emergency opening of the working chamber door
- Close the blank magazine Part of the blank changer in which you store the blanks for automatic loading. door.
- Connect the machine to the external compressed air supply.
- Connect the machine to the electrical source
- Switch on the machine at the main power switch.
- Start the CAM computer The computer that is connected to your machine and which runs dentalcam and dentalcnc..
- The machine references.